How do I install the Wolfram Workbench plugin for Eclipse?
Read this article in: Español, Français, 日本語
Wolfram Workbench is the recommended tool for programming in Wolfram Language outside of the notebook interface. Wolfram Workbench is a plugin for Eclipse, a popular and robust IDE.
Wolfram Workbench requires the following software:
We recommend having the latest version of these installed before setting up the Wolfram Workbench plugin. Additionally, note that:
- Your Eclipse setup should include Java Runtime Enviroment (JRE).
- The Wolfram Workbench plugin is compatible with the various standard Eclipse IDEs.
To set up Wolfram Workbench, install the plugin inside Eclipse and configure it to point to your Mathematica installation:
- Start Eclipse.
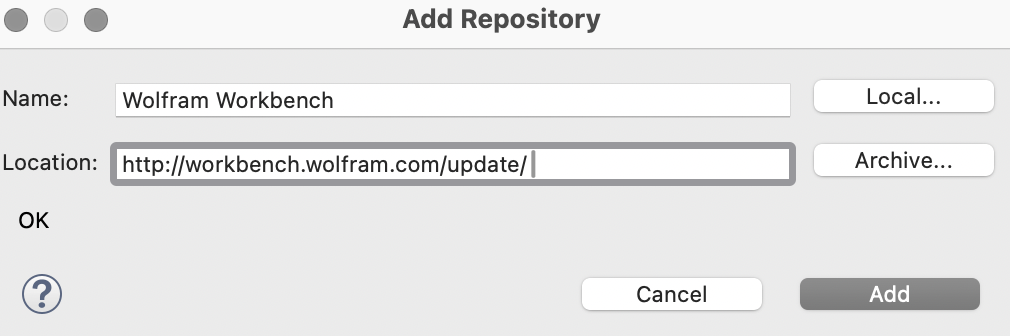
- Select the menu item Help ► Install New Software. The Available Software dialog appears.

- Click the Add button near the top right-hand corner.
- Enter a name such as “Wolfram Workbench” into the Name field and http://workbench.wolfram.com/update/ into the Location field.
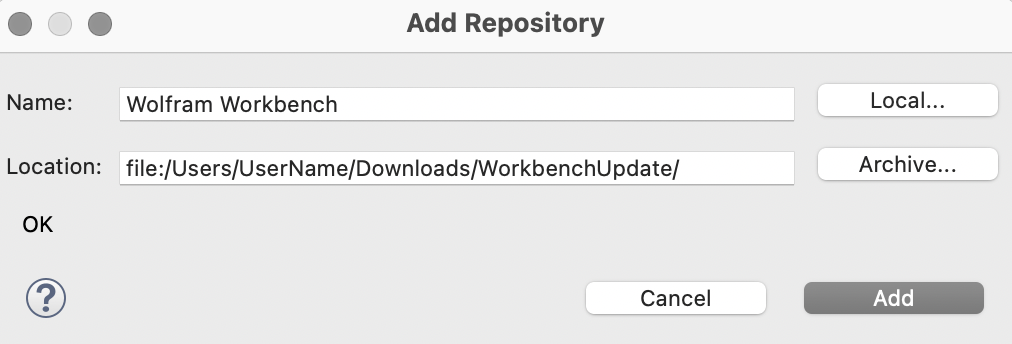
If you have already downloaded the plugin from the Workbench product page, extracted the WorkbenchUpdate.zip file into a directory. Click Local and select the folder or add the path directly into the Location field: file:/Users/UserName/Downloads/WorkbenchUpdate/
- Click OK to confirm the site information. A list of Wolfram Workbench plugins is now displayed.
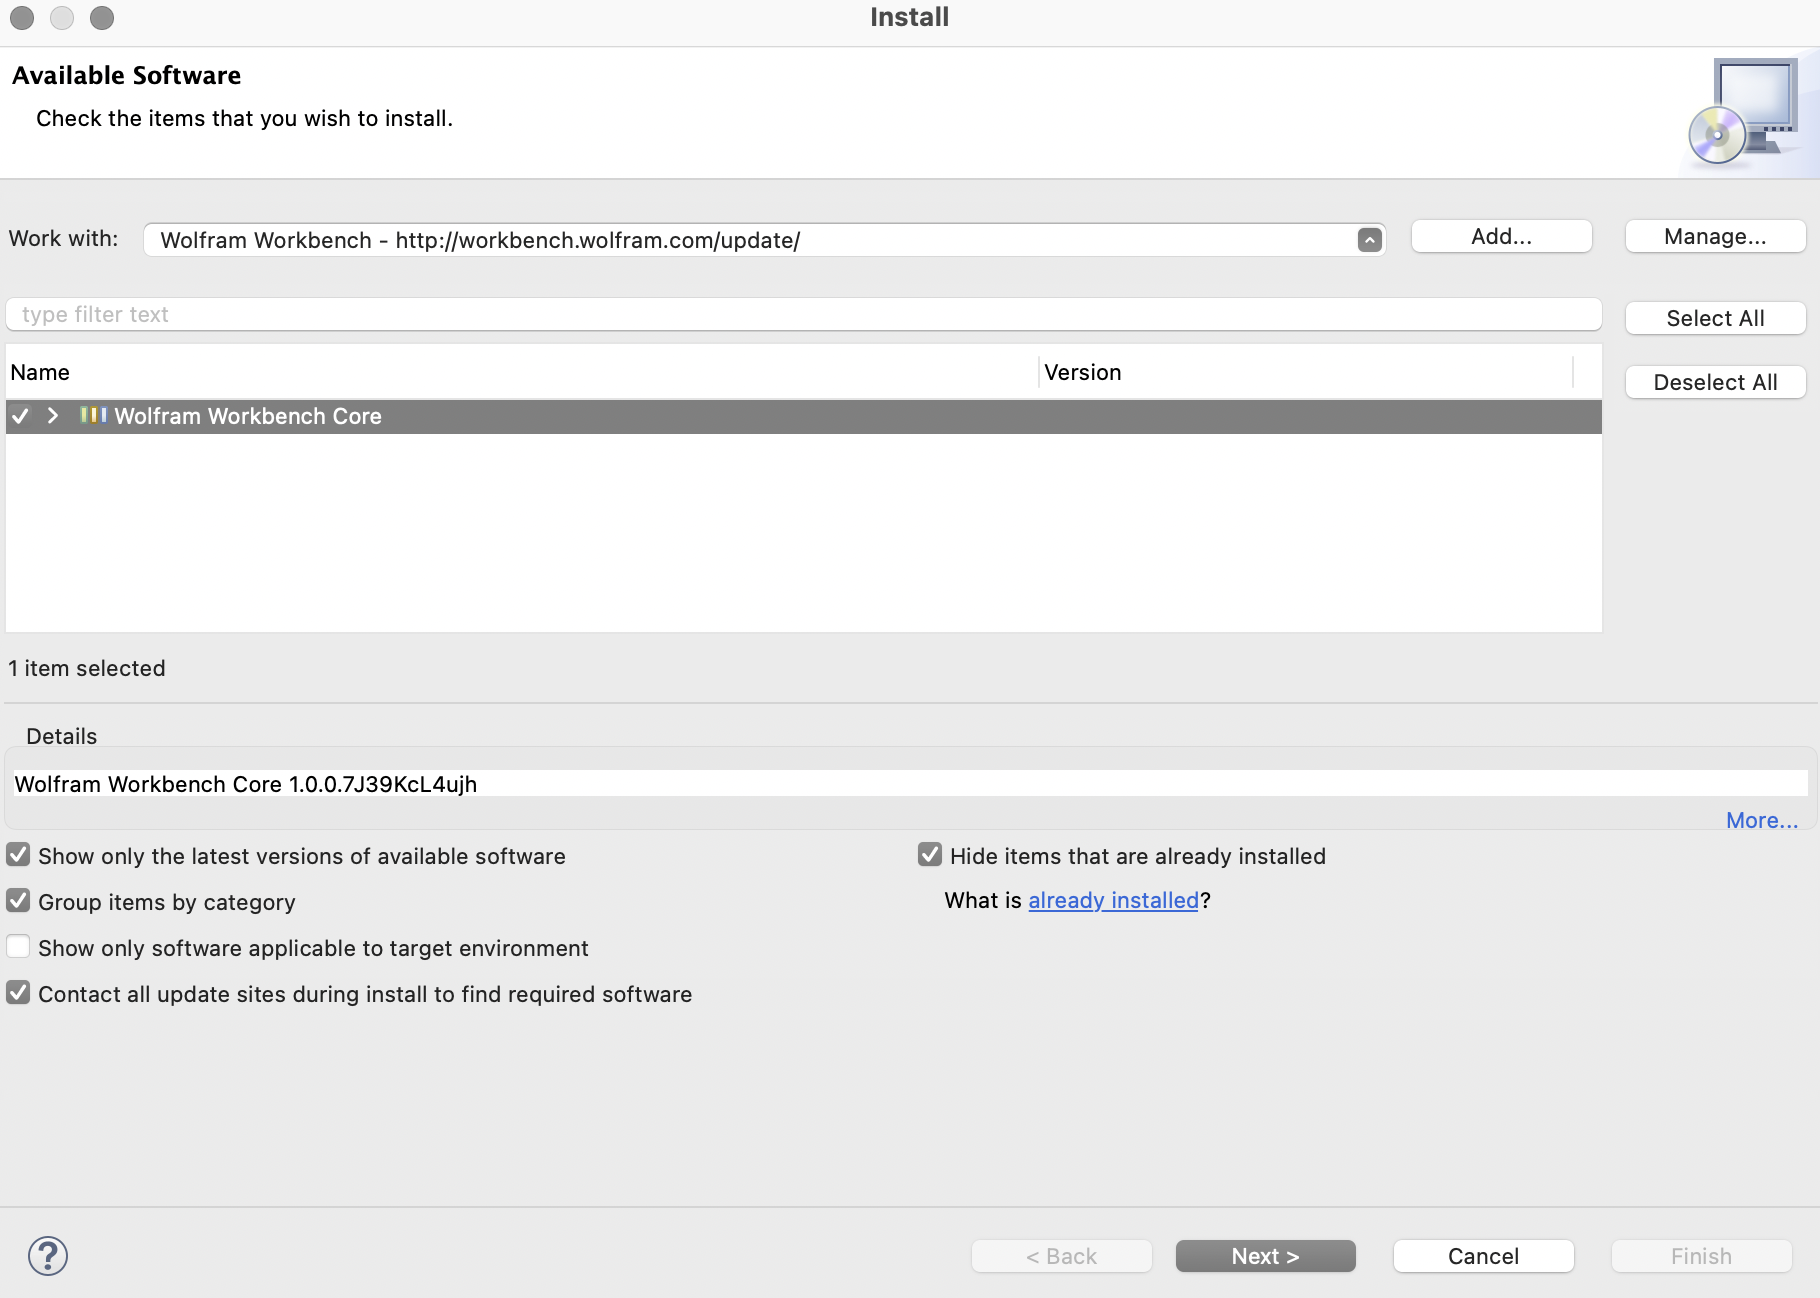
- Select Wolfram Workbench Core. Click Next to confirm.
- In the Install Details window, click Next.
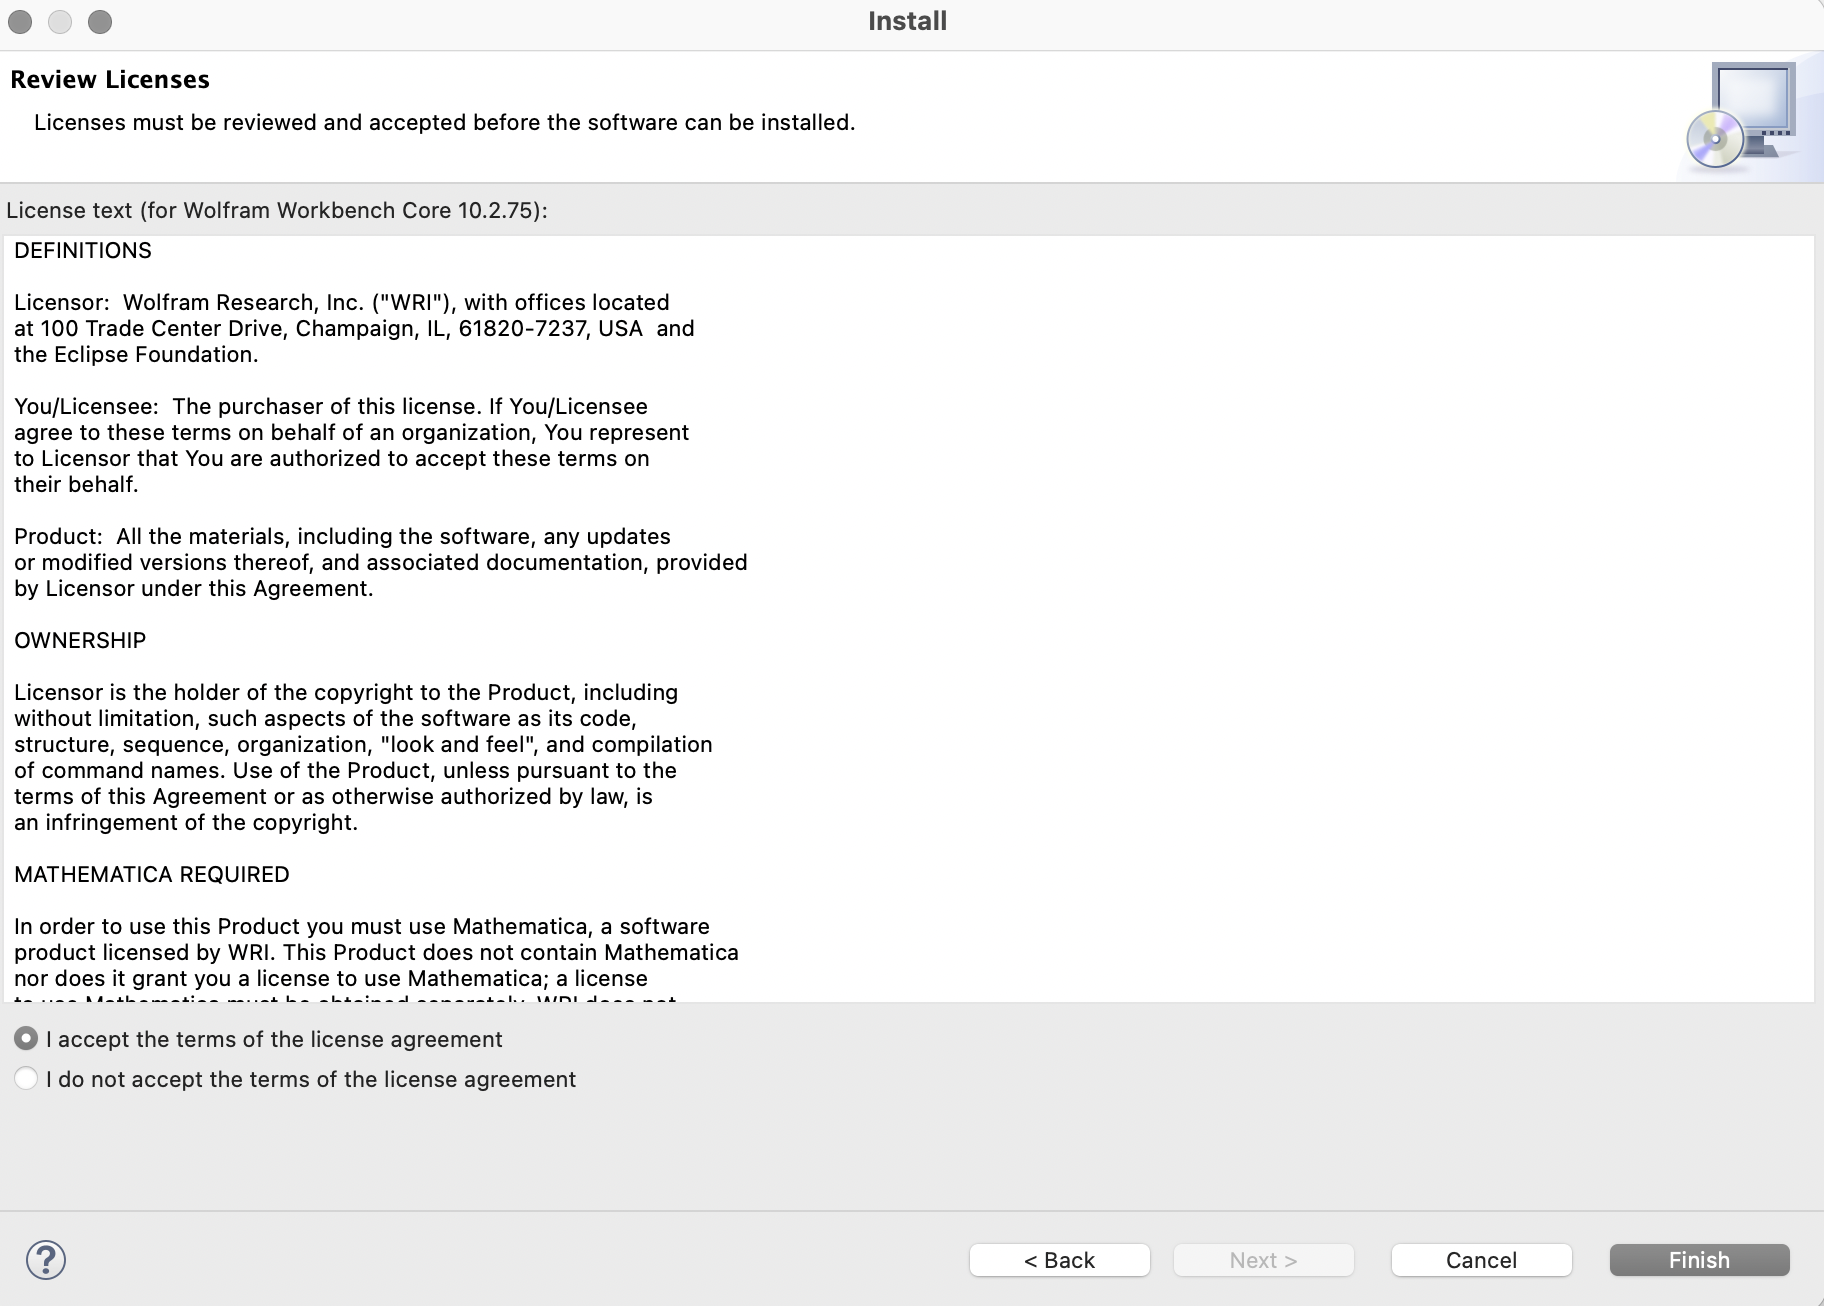
- In the Review Licenses window, review and accept the terms of the license agreements. Click Finish to begin the installation.
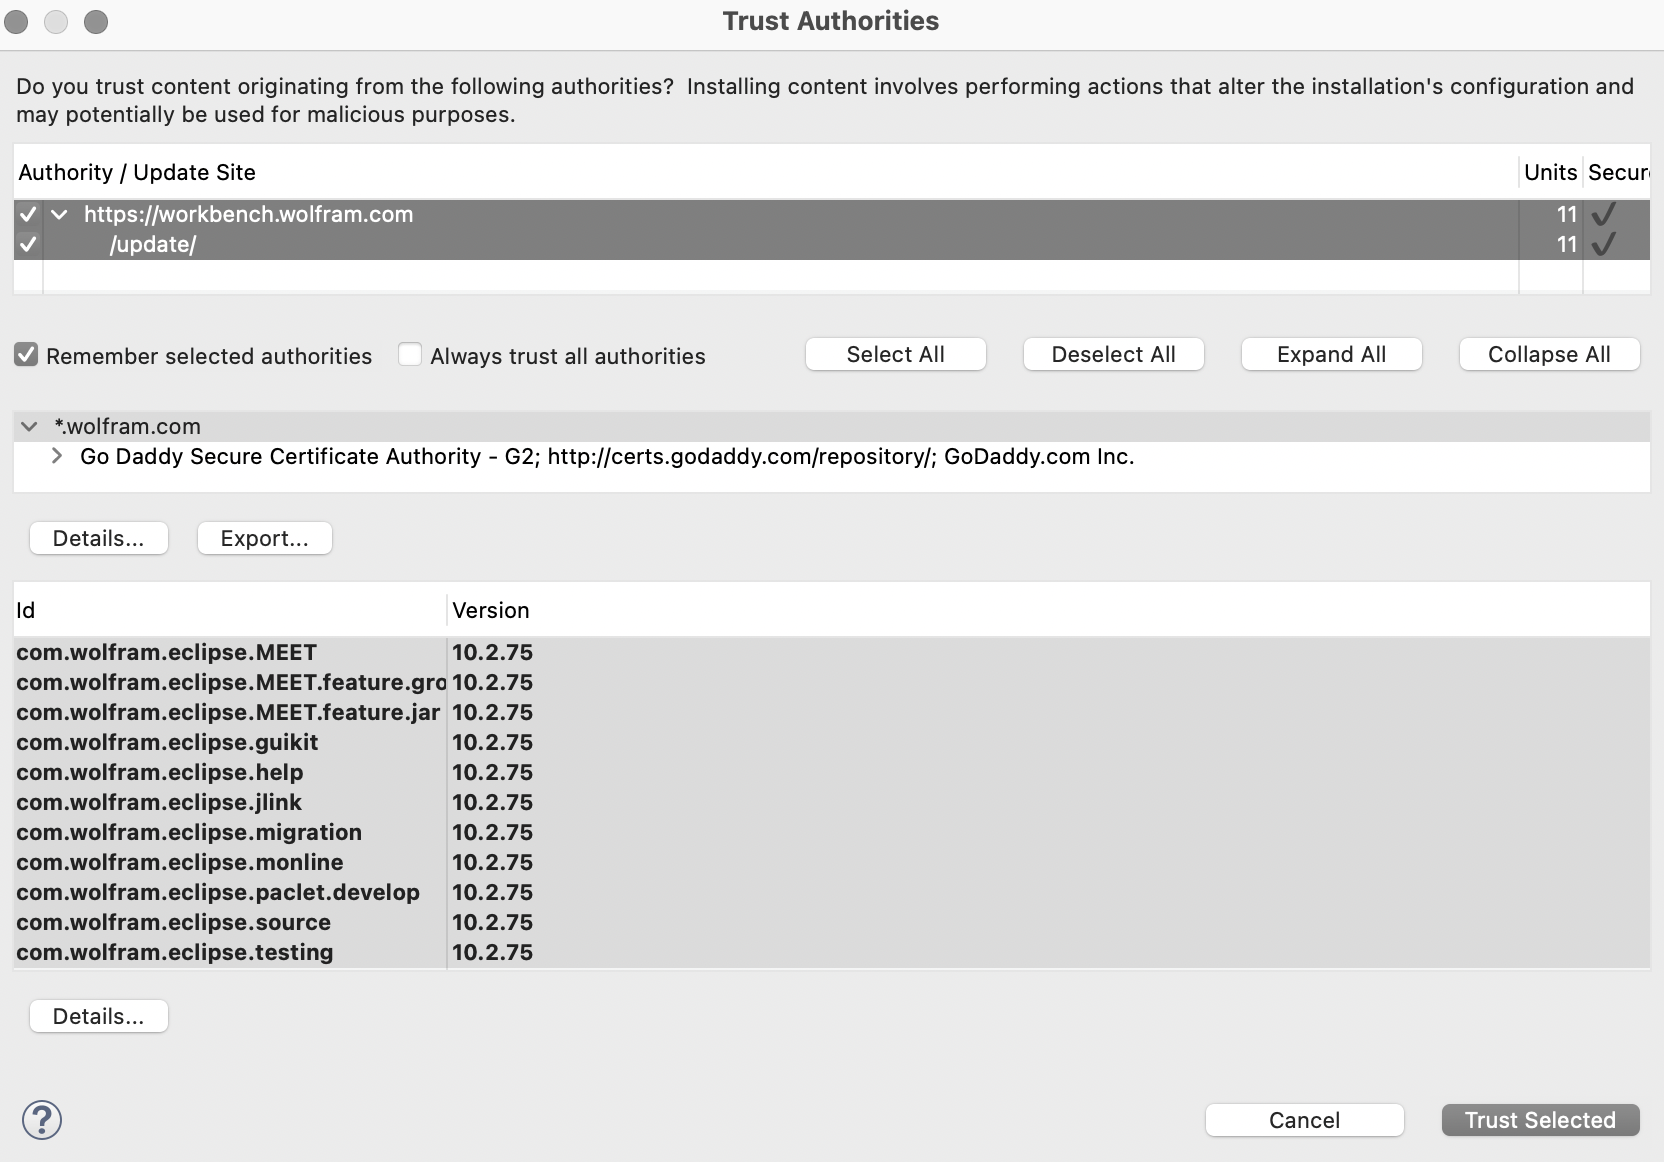
- Wolfram Workbench installs. During the installation, a “Trust Authorities” window may appear asking you to trust content from https://workbench.wolfram.com/update/. Make sure the Wolfram update site is selected, then click “Trust Selected” to continue the installation.
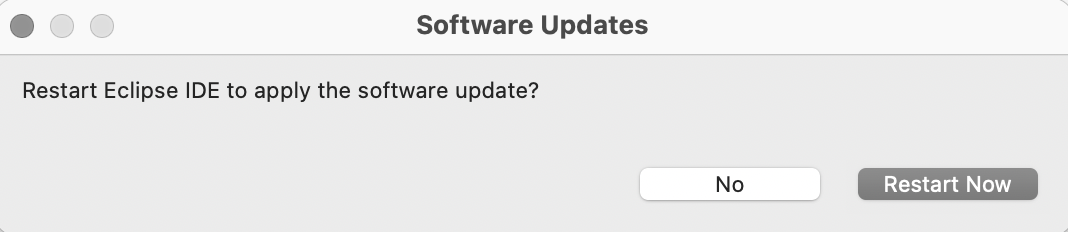
- Restart Eclipse for the changes to take effect.
The Wolfram Workbench plugin is now installed. To verify, choose Eclipse ► About Eclipse (macOS) and identify the Wolfram Workbench logo toward the bottom of the window.
![]()
Configuring the Wolfram Workbench Plugin
If multiple versions of Mathematica are installed on your machine, you can select which version you would like Wolfram Workbench to use.
- Open the Eclipse Preferences (Windows/Linux: Window ► Preferences, macOS: Eclipse ► Settings).
- Select the Wolfram category on left-hand side of the Preferences window. The available Wolfram Engines will be displayed.
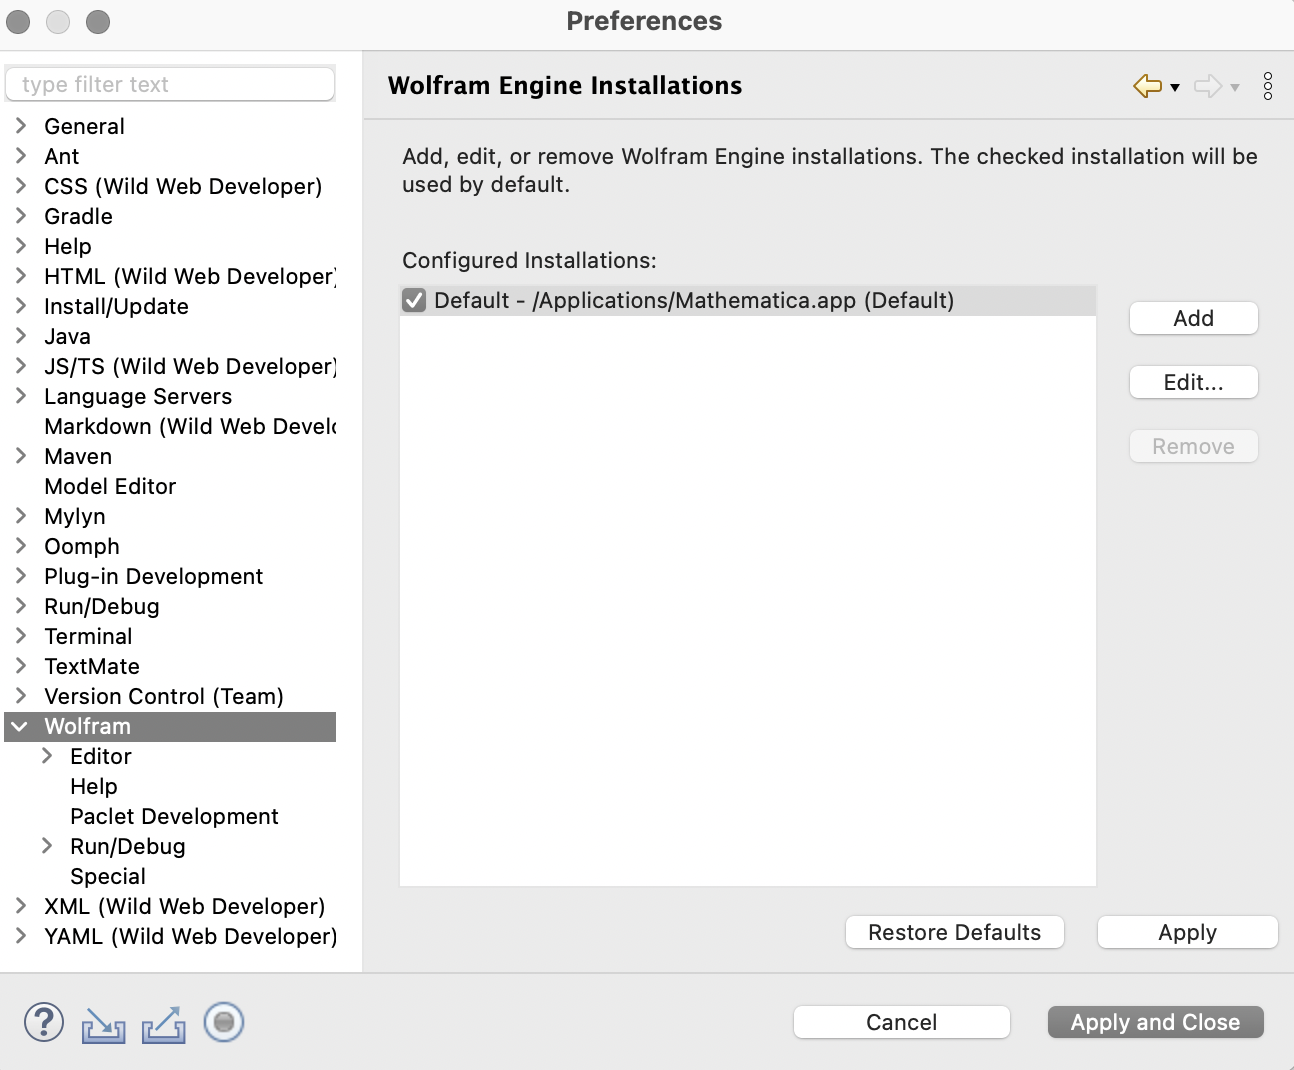
Installed versions of Mathematica within the list can be edited by selecting Edit, or further installations can be added by selecting Add and entering the product name and installation path.
- Choose your preferred Wolfram Engine installation. Click OK to confirm.
Contact Support
Whether you have a question about billing, activation or something more technical, we are ready to help you.
1-800-WOLFRAM (+1-217-398-0700 for international callers)
Customer Support
Monday–Friday
8am–5pm US Central Time
- Product registration or activation
- Pre-sales information and ordering
- Help with installation and first launch
Advanced Technical Support (for eligible customers)
Monday–Thursday
8am–5pm US Central Time
Friday
8:30–10am & 11am–5pm US Central Time
- Priority technical support
- Product assistance from Wolfram experts
- Help with Wolfram Language programming
- Advanced installation support