How can I connect Wolfram Cloud MCP to my AI application?
Wolfram Cloud MCP enables MCP-compatible AI applications to access Wolfram|Alpha, Wolfram Language and the Wolfram Knowledgebase using the Model Context Protocol (MCP).
Its server URL is:
https://agenttools.wolfram.com/mcpWolfram Cloud MCP is free to use and does not require any authentication.
Most AI clients can connect to Wolfram Cloud MCP. Specific setup instructions for a variety of them are provided below.
Selection of Supported Clients
This article provides setup steps for:
- Antigravity
- ChatGPT on desktop
- ChatGPT on web
- Claude on desktop
- Claude on web
- Cline
- Codex
- Continue
- Cursor
- LibreChat
- OpenCode
- Windsurf
- Zed
- Claude on web
If you do not see your client here, check your client’s documentation for directions on connecting to a remote MCP service.
Antigravity
- Open Antigravity.
- Open the MCP store via the “…” drop-down at the top of the editor’s agent panel.
- Click Manage MCP Servers.
- Click View raw config.
- Modify the
mcp_config.jsonwith your custom MCP server configuration.
{
  "mcpServers": {
    "wolfram": {
      "serverUrl": "https://agenttools.wolfram.com/mcp",
      "headers": {
        "Content-Type": "application/json"
      },
      "disabled": false
    }
  }
}
ChatGPT on Desktop
- Open your ChatGPT app.
- Open Apps.
- Search for Wolfram.
- Click Wolfram.
- Click Connect.
- When prompted to add Wolfram to ChatGPT, click Connect.
- Verify that the Wolfram app is installed.
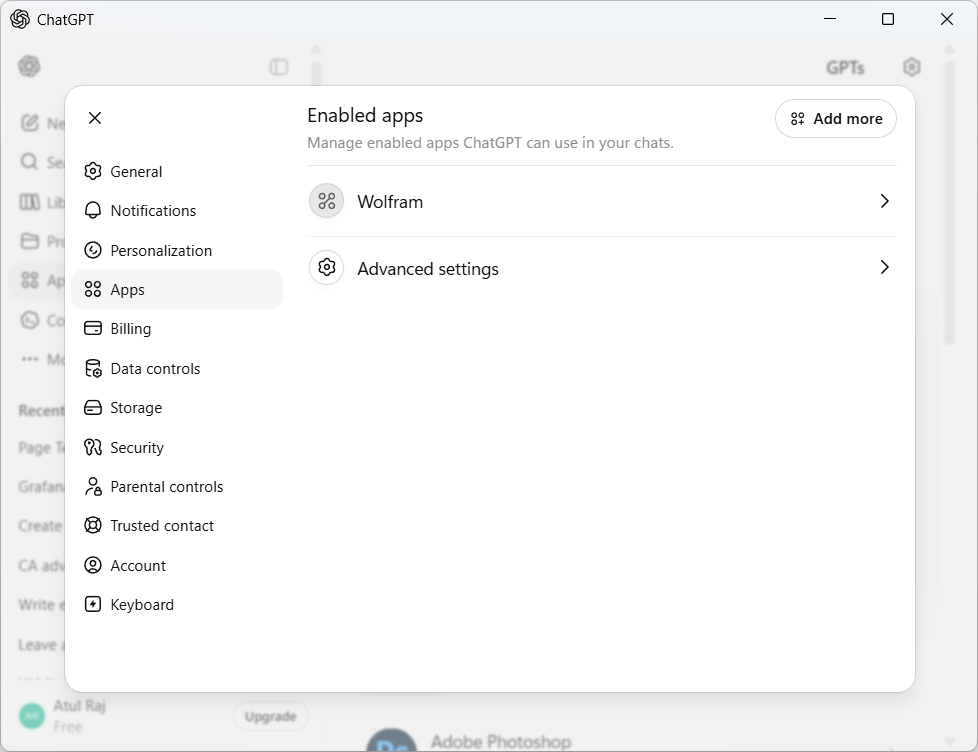
ChatGPT on Web
- In your browser, go to ChatGPT.
- Click here to open the Wolfram app page.
- Click Connect.
- When prompted to add Wolfram to ChatGPT, click Connect.
- Verify e.g. in … > Manage that the Wolfram plugin app is installed.
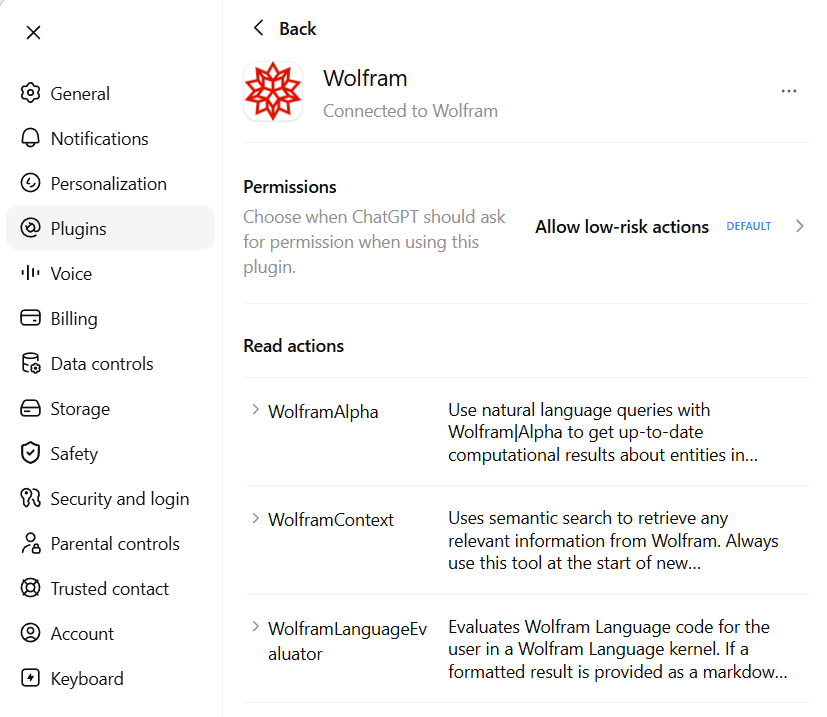
Claude on Desktop
- Open your Claude app.
- Click Customize.
- Click Connectors.
- Search for Wolfram.
- Click the + icon to add Wolfram.
- Verify that the Wolfram connector is installed and that all Wolfram tools are enabled.
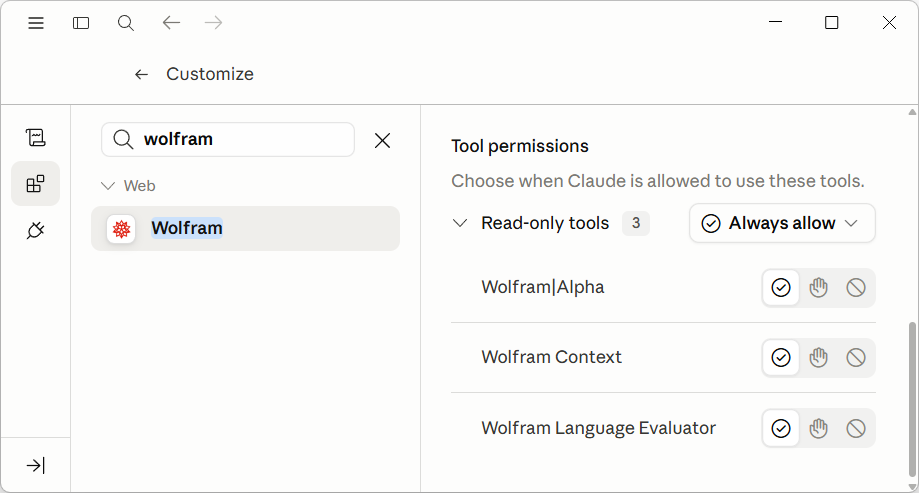
Claude on Web
- In your browser, go to Claude.
- Click here to open the Wolfram connector page.
- Click Connect to add Wolfram.
- Verify that the Wolfram connector is installed.
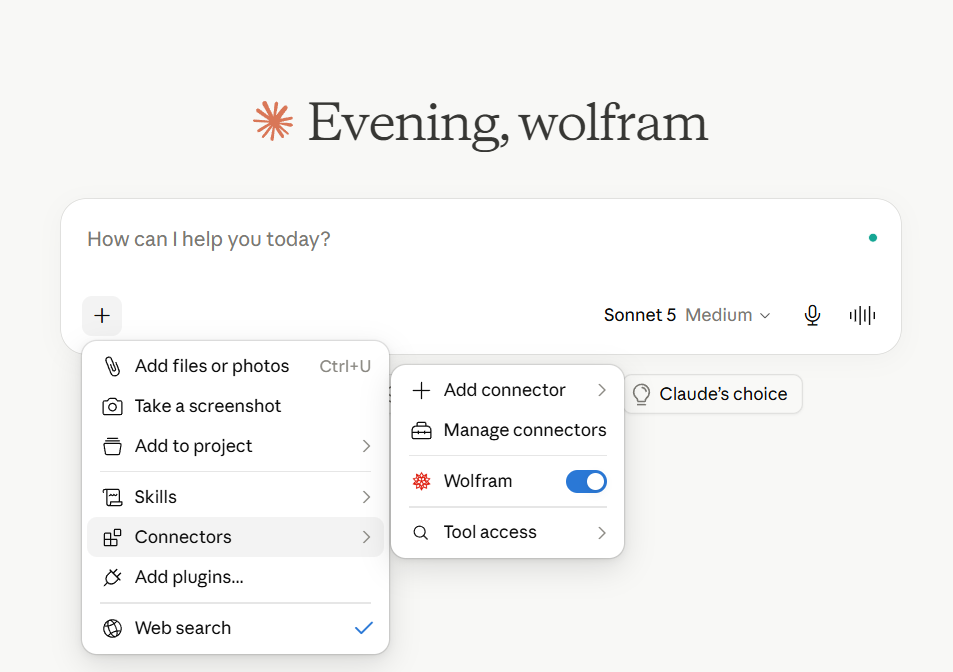
Cline
- Open Cline in VS Code.
- Click MCP Servers.
- Select the Remote Servers tab.
- Click the Edit Configuration button.
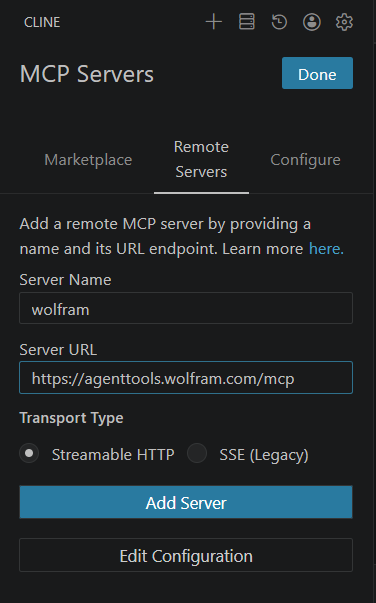
- Add the following configuration and save the file.
{
  "mcpServers": {
    "Wolfram": {
      "url": "https://agenttools.wolfram.com/mcp",
      "type": "streamableHttp",
      "disabled": false,
      "autoApprove": []
    }
  }
}
Codex
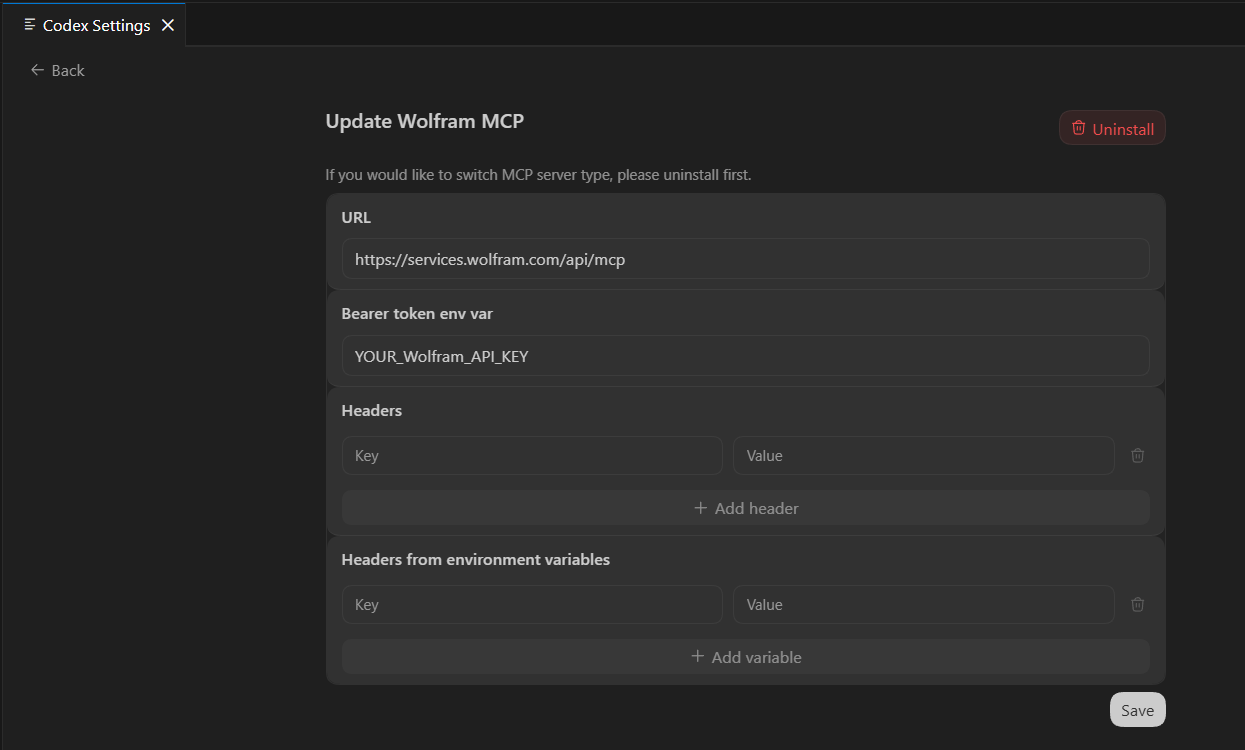
- Open Codex in VS Code.
- Go to Settings, then open the MCP Settings section.
- Add the following configuration and save the changes.
Continue
- Open Continue in VS Code.
- Navigate to the
.continue/mcpServersdirectory in your user home folder. - Add the following configuration and save the YAML file.
name: Wolfram MCP
version: 0.0.1
schema: v1
mcpServers:
  - name: Wolfram
    command: npx
    args:
      - "-y"
      - "mcp-remote@latest"
      - "https://agenttools.wolfram.com/mcp"
Cursor
- Open Cursor.
- Click Tools & MCP.
- Click New MCP Server.
- Add the following configuration and save.
{
  "mcpServers": {
    "Wolfram": {
      "url": "https://agenttools.wolfram.com/mcp"
    }
  }
}
LibreChat
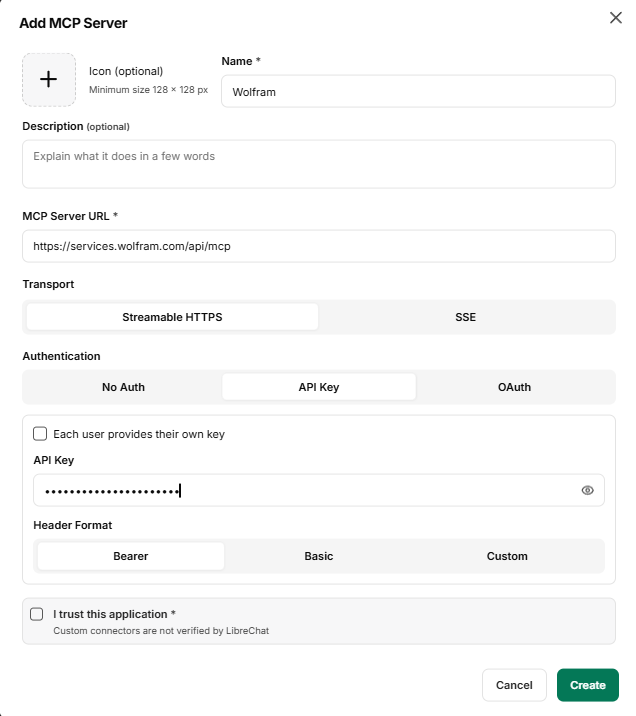
- Open LibreChat.
- Open MCP Settings.
- Click the + icon to add a new MCP server.
- Enter the following configuration details as shown.
- Enable I trust this application.
- Click Create to save the configuration.
Name: Wolfram
MCP Server URL: https://services.wolfram.com/api/mcp
Transport: Streamable HTTPS
Authentication: API Key
API Key: <YOUR_WOLFRAM_MCP_SERVICE_API_KEY>
Header Format: Bearer
OpenCode
- Navigate to
%USERPROFILE%\.config\opencode\opencode.jsonc. - Edit the configuration file.
- Add the following Wolfram MCP configuration.
- Save the file.
- Restart OpenCode.
- Verify that the server appears in the MCP tab under Status.
{
  "$schema": "https://opencode.ai/config.json",
  "mcp": {
    "wolfram": {
      "type": "remote",
      "url": "https://agenttools.wolfram.com/mcp",
      "enabled": true,
      "oauth": false
    }
  }
}Windsurf
- Open Windsurf.
- Navigate to
%USERPROFILE%\.codeium\windsurf\mcp_config.json. - Add the following configuration and save the file.
{
  "mcpServers": {
    "wolfram": {
      "command": "npx",
      "args": [
        "mcp-remote",
        "https://agenttools.wolfram.com/mcp"
      ]
    }
  }
}
Zed
- Open Zed.
- Open the Agent Panel.
- Click MCP Servers.
- Select Add Custom Server….
- Add the following configuration and save the changes.
{
    "wolfram": {
      "enabled": true,
      "remote": false,
      "command": "C:\\Progra~1\\nodejs\\npx.cmd",
      "args": ["-y", "mcp-remote@latest", "https://agenttools.wolfram.com/mcp"],
    },
}Contact Support
Whether you have a question about billing, activation or something more technical, we are ready to help you.


1-800-WOLFRAM (+1-217-398-0700 for international callers)
Customer Support
Monday–Friday
8am–5pm US Central Time
- Product registration or activation
- Pre-sales information and ordering
- Help with installation and first launch
Advanced Technical Support (for eligible customers)
Monday–Thursday
8am–5pm US Central Time
Friday
8:30–10am & 11am–5pm US Central Time
- Priority technical support
- Product assistance from Wolfram experts
- Help with Wolfram Language programming
- Advanced installation support